Image Grading Application User Guide
Overview
The Image Grading Application is a web-based tool for grading retinal images to assist in glaucoma detection. Users can assess the Cup-to-Disc Ratio (CDR), Image Quality, and Diagnosis for each image in a dataset.
Getting Started
1. Accessing the Application
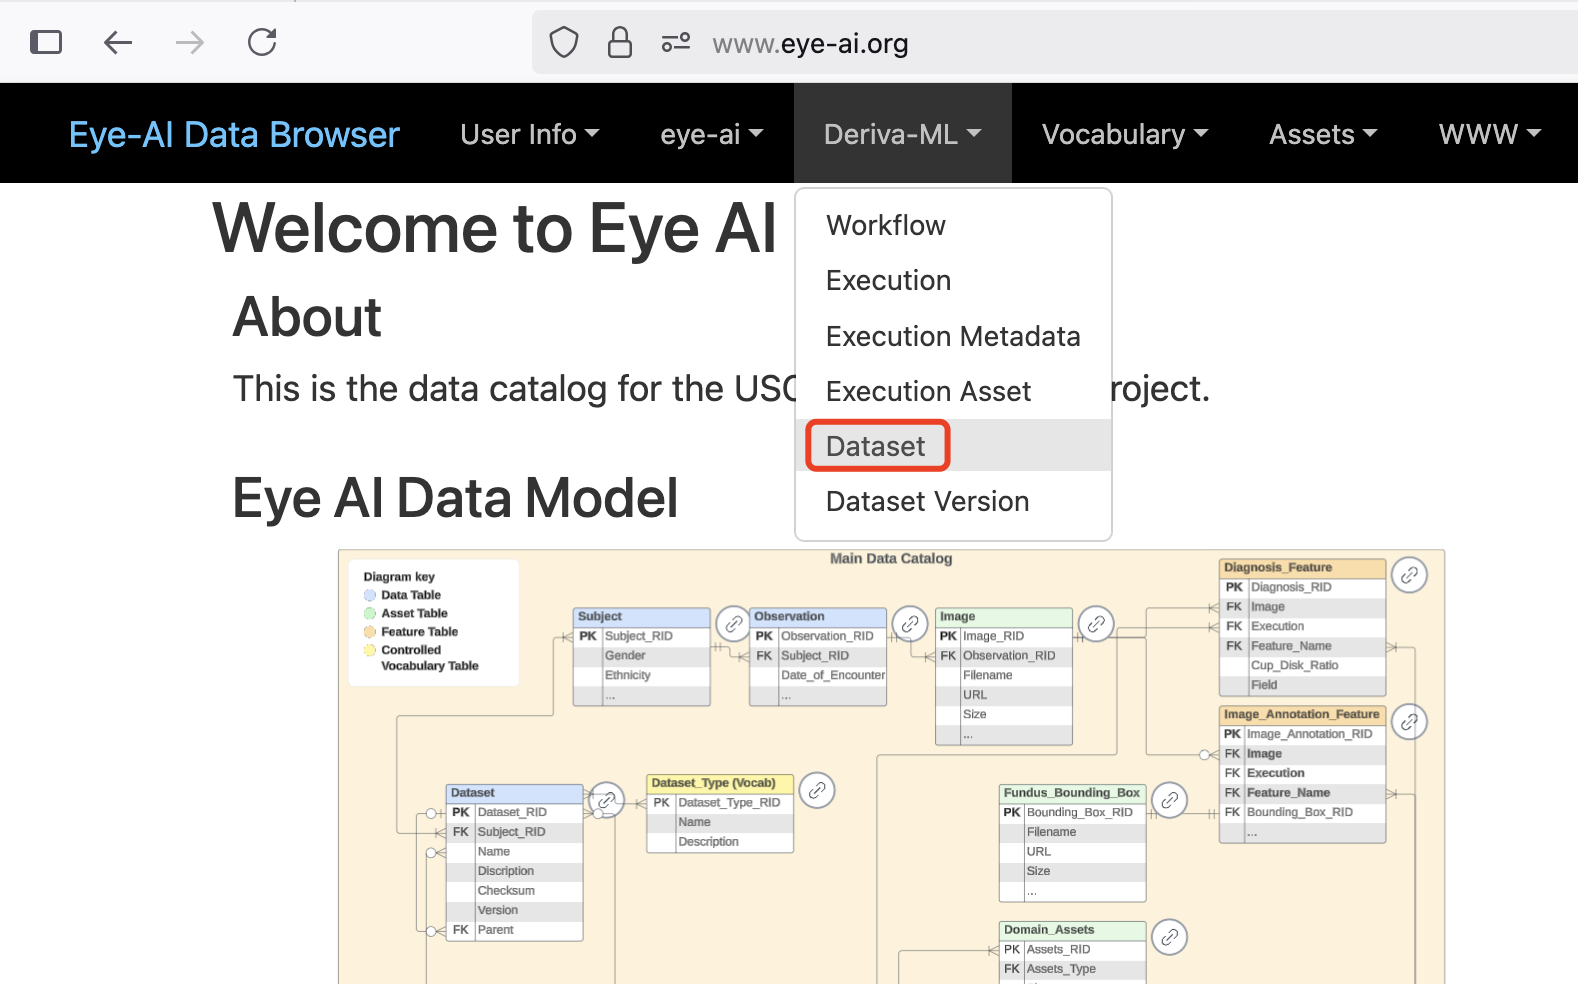
- Log in to the Eye-AI platform: https://eye-ai.org/
- Navigate to the "Dataset" table under the "Deriva-ML" section in the navigation bar.
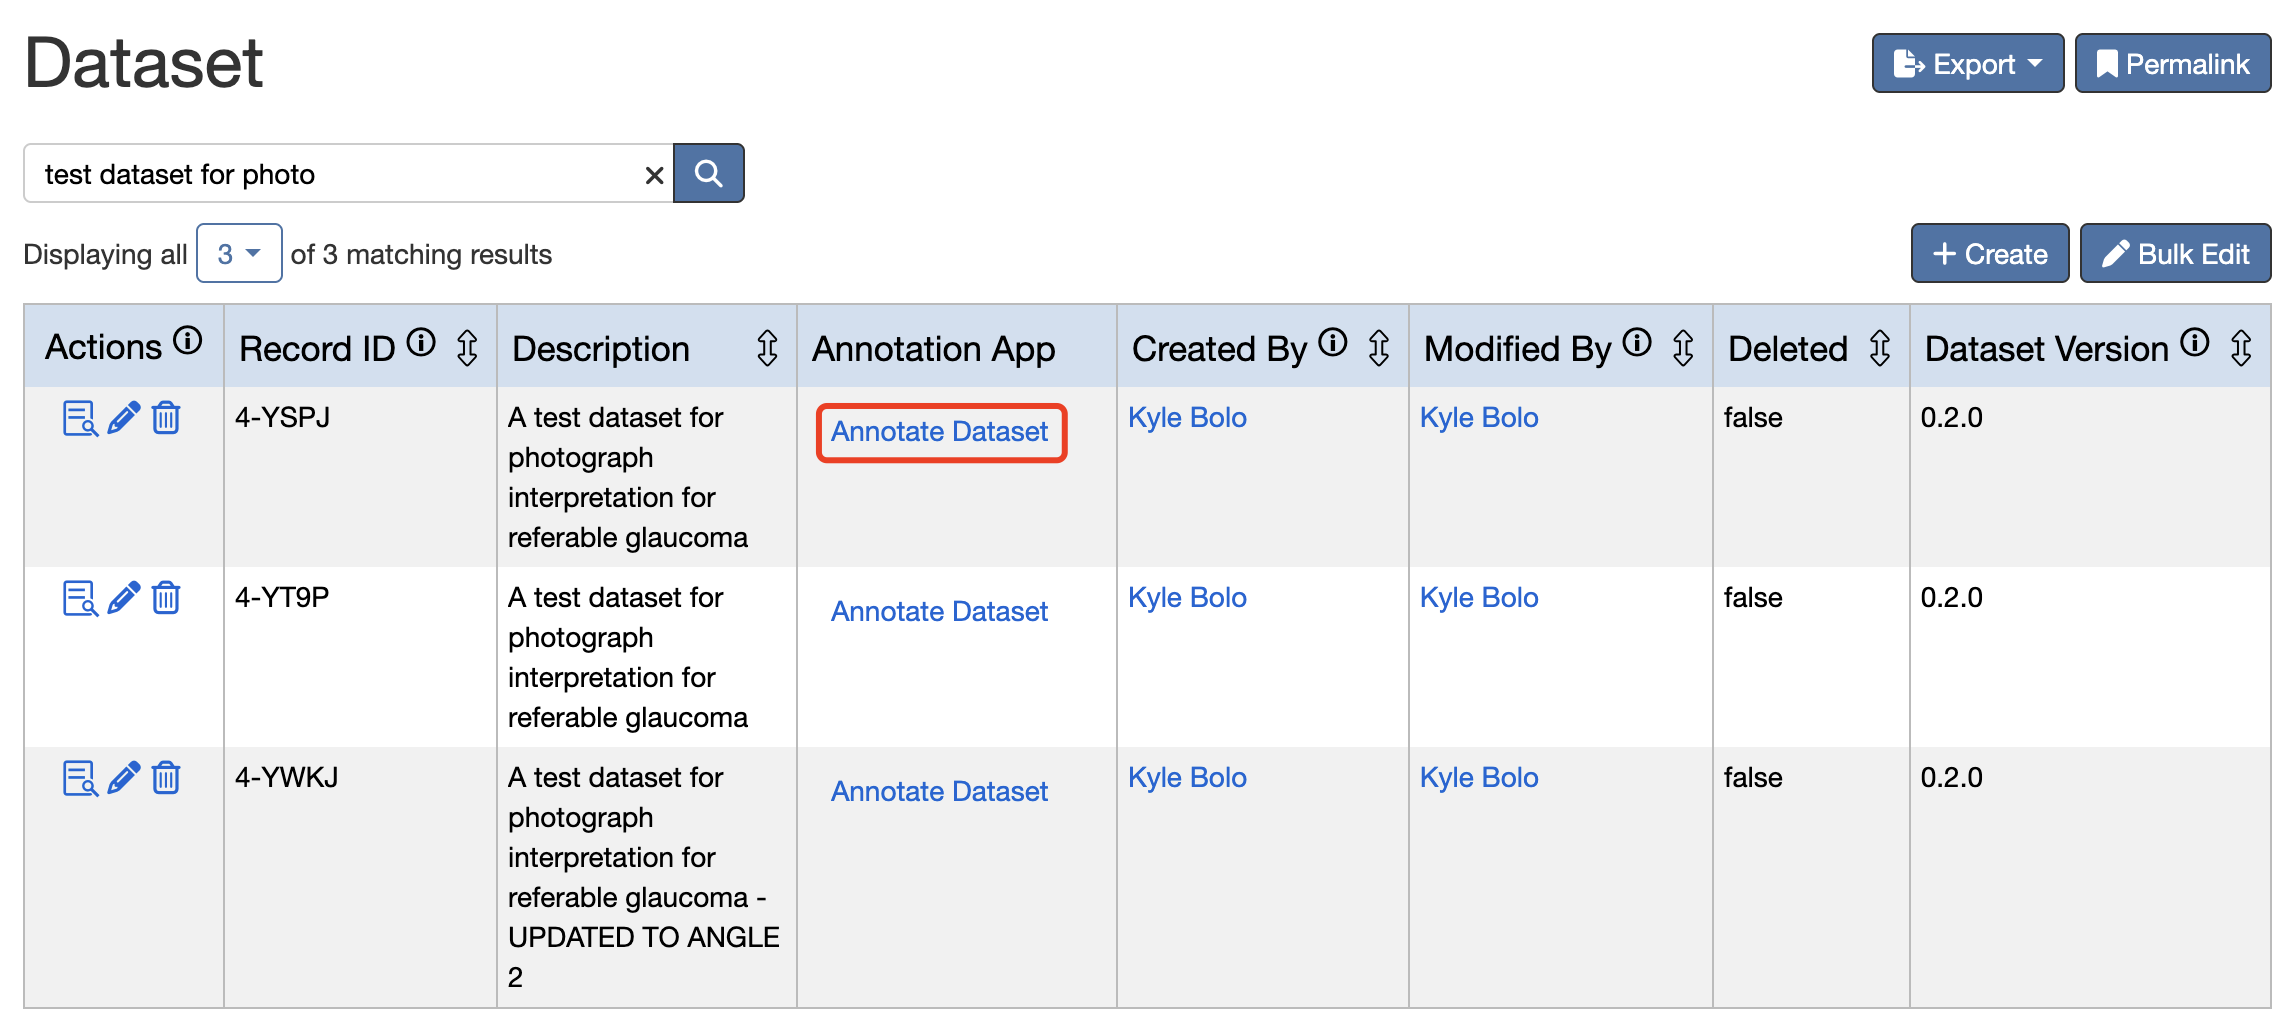
- Locate the Image dataset you want to grade. Click the "Annotate Dataset" button to enter the grading app.
2. Initial Setup
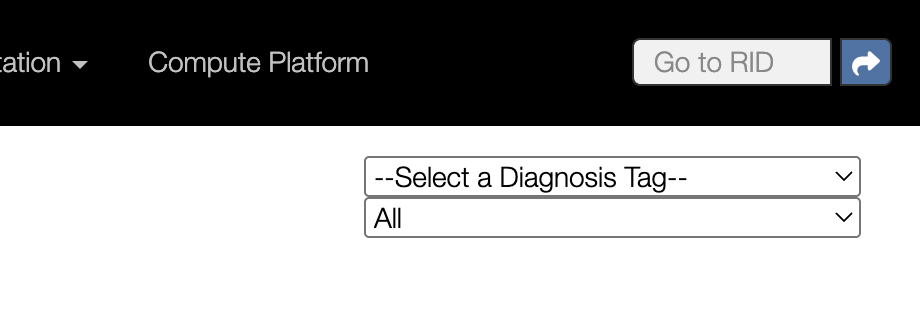
- Select Diagnosis Tag: Choose the appropriate diagnosis tag from the dropdown menu.
- This determines the type of grading you will perform.
- Available tags will load automatically.
- Choose Filter View: For the first time, select All to display all images in the dataset. Afterward, you can use the filter dropdown to view:
- Completed: Displays only graded images.
- Not Completed: Displays images that still need grading.
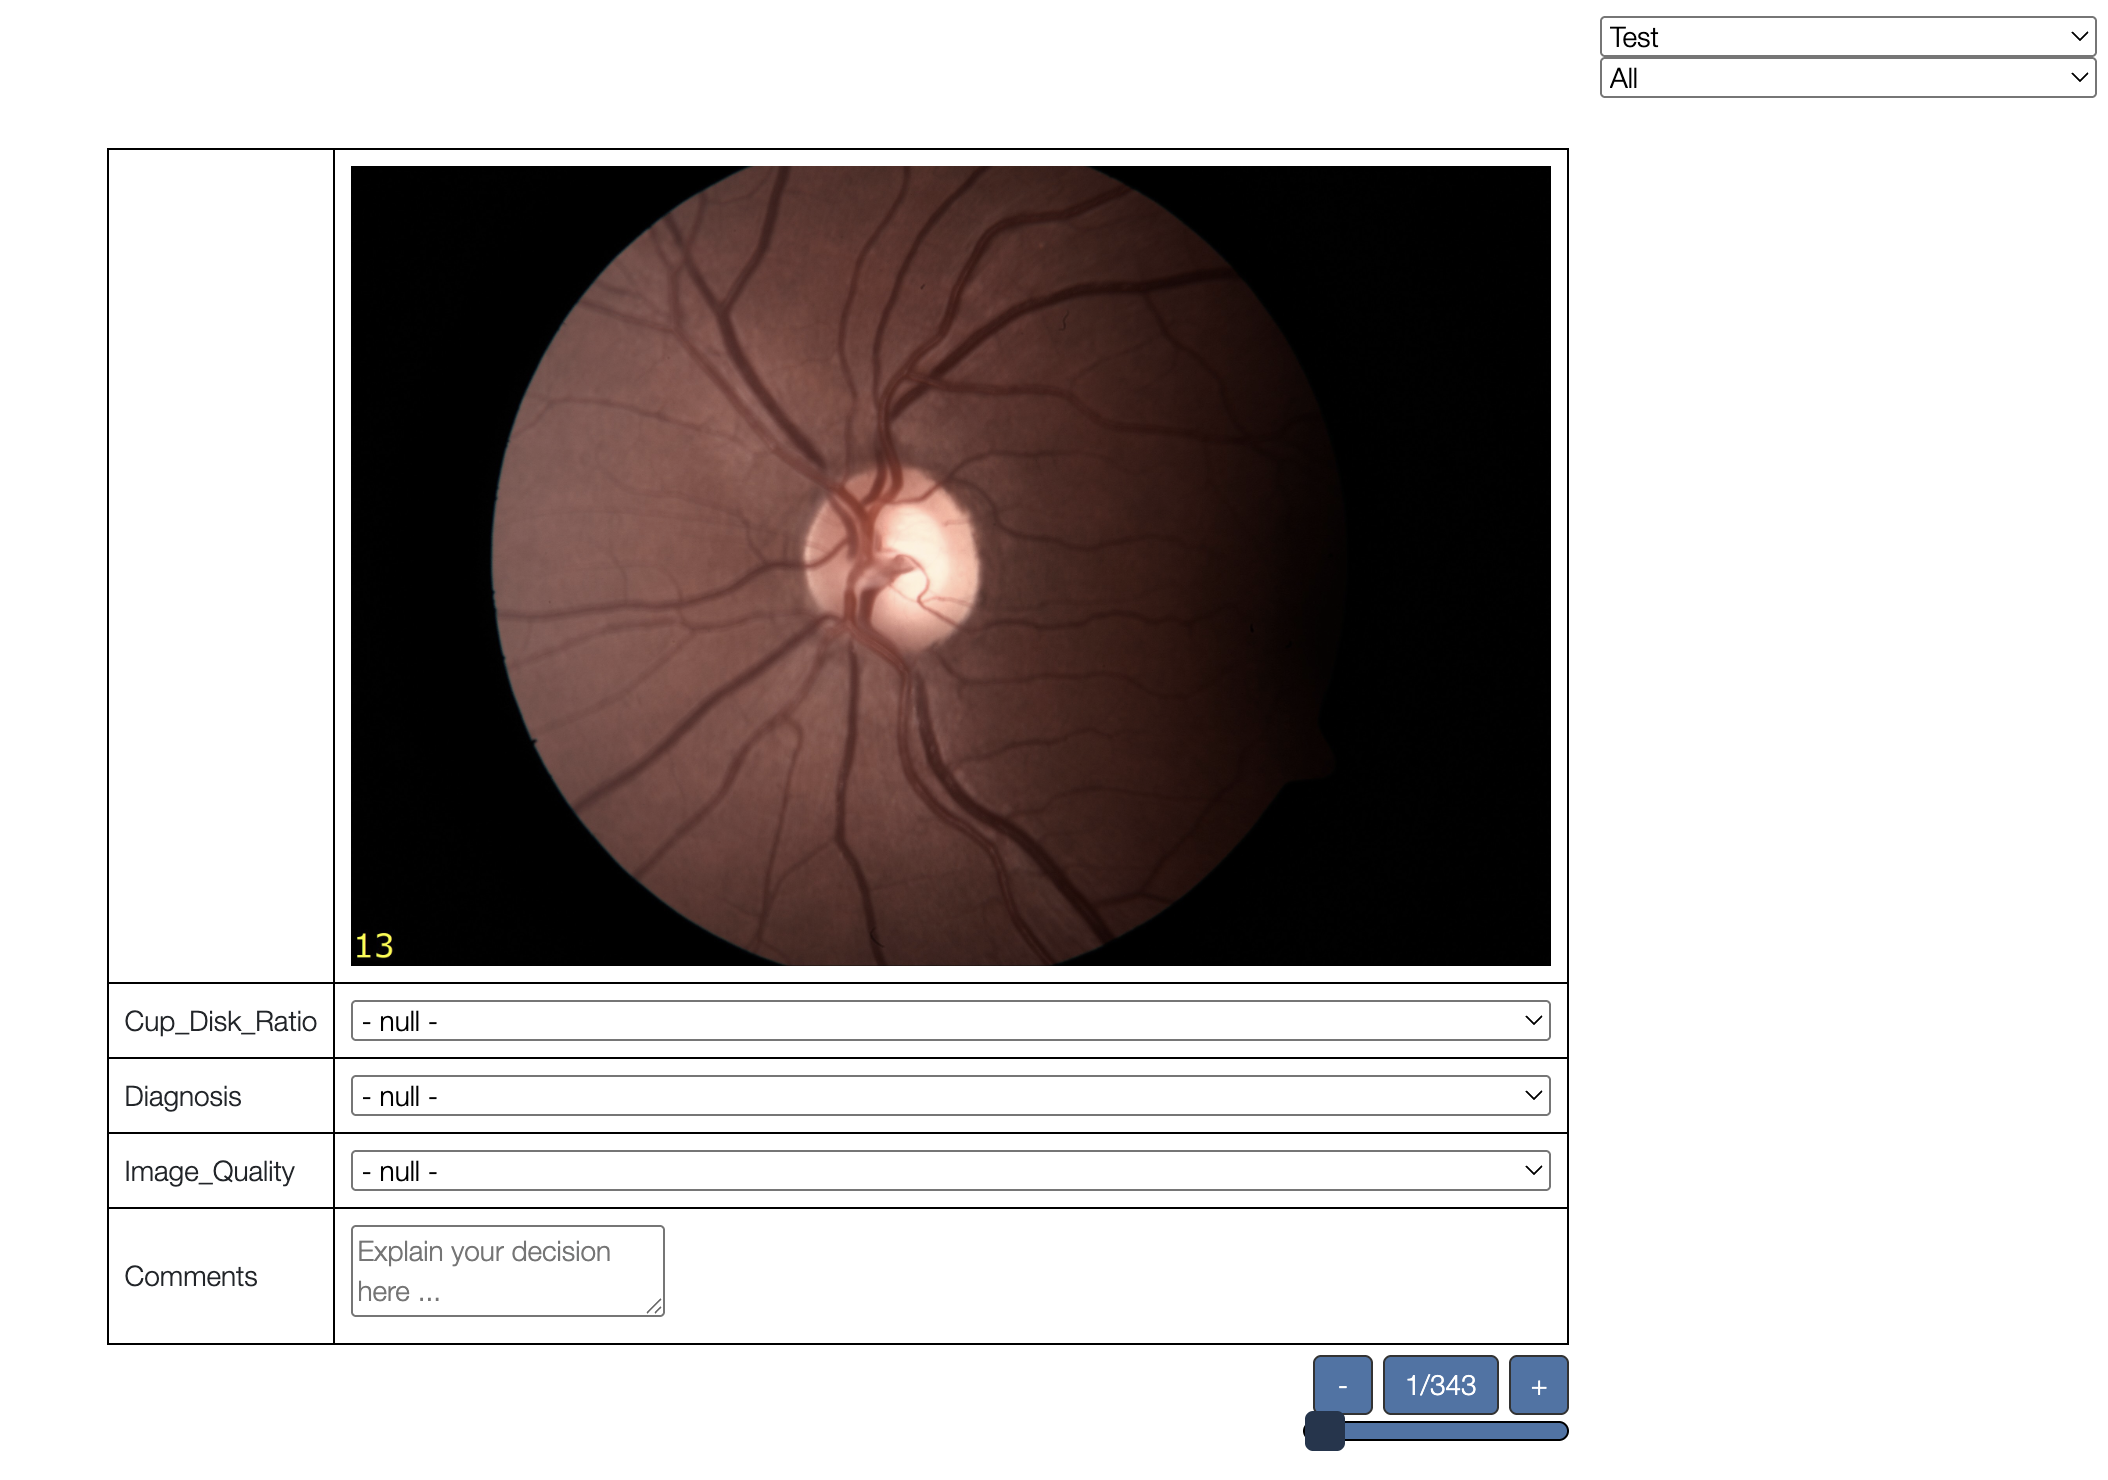
3. Grading Interface
After selecting the diagnosis tag, the grading interface displays all images in the dataset:
- Image Display: The retinal image to grade.
- Cup-to-Disc Ratio (CDR): Dropdown for selecting CDR values (0.1 to 0.9).
- Diagnosis: Dropdown for selecting the diagnosis (No Glaucoma, Suspected Glaucoma).
- Image Quality: Dropdown for selecting quality (Good, Bad).
- Comments: Text area for additional notes.
- Navigation Controls: Previous/Next buttons and an image counter.
Keyboard Shortcuts (Hotkeys)
- Navigation:
- Right arrow: Move to the next image.
- Left arrow: Move to the previous image.
- Cup-to-Disc Ratio:
- 1-9: Set CDR to 0.1-0.9, respectively.
- Image Quality:
- G: Set Image Quality to "Good."
- B: Set Image Quality to "Bad."
- Diagnosis:
- W: Set Diagnosis to "No Glaucoma."
- S: Set Diagnosis to "Suspected Glaucoma."
4. Ending and Resuming the Grading Process
Ending the Grading Session
You can close the grading interface by closing the web page at any time. To ensure your progress is saved, use the right arrow key to move to the next image before closing.
Resuming After an Interruption
- Reopen the Application: Navigate to the "Annotate Dataset" button on the Dataset table.
- Select the Same Diagnosis Tag: Choose the tag you were using previously.
- Use Filter Options:
- Select "Not Completed" to view remaining images.
- Select "Completed" to review your work.
- Select "All" to see the entire dataset.
- Continue Grading: The application will remember your previous selections.
5. Automatic Progress Tracking
The application automatically tracks your progress:
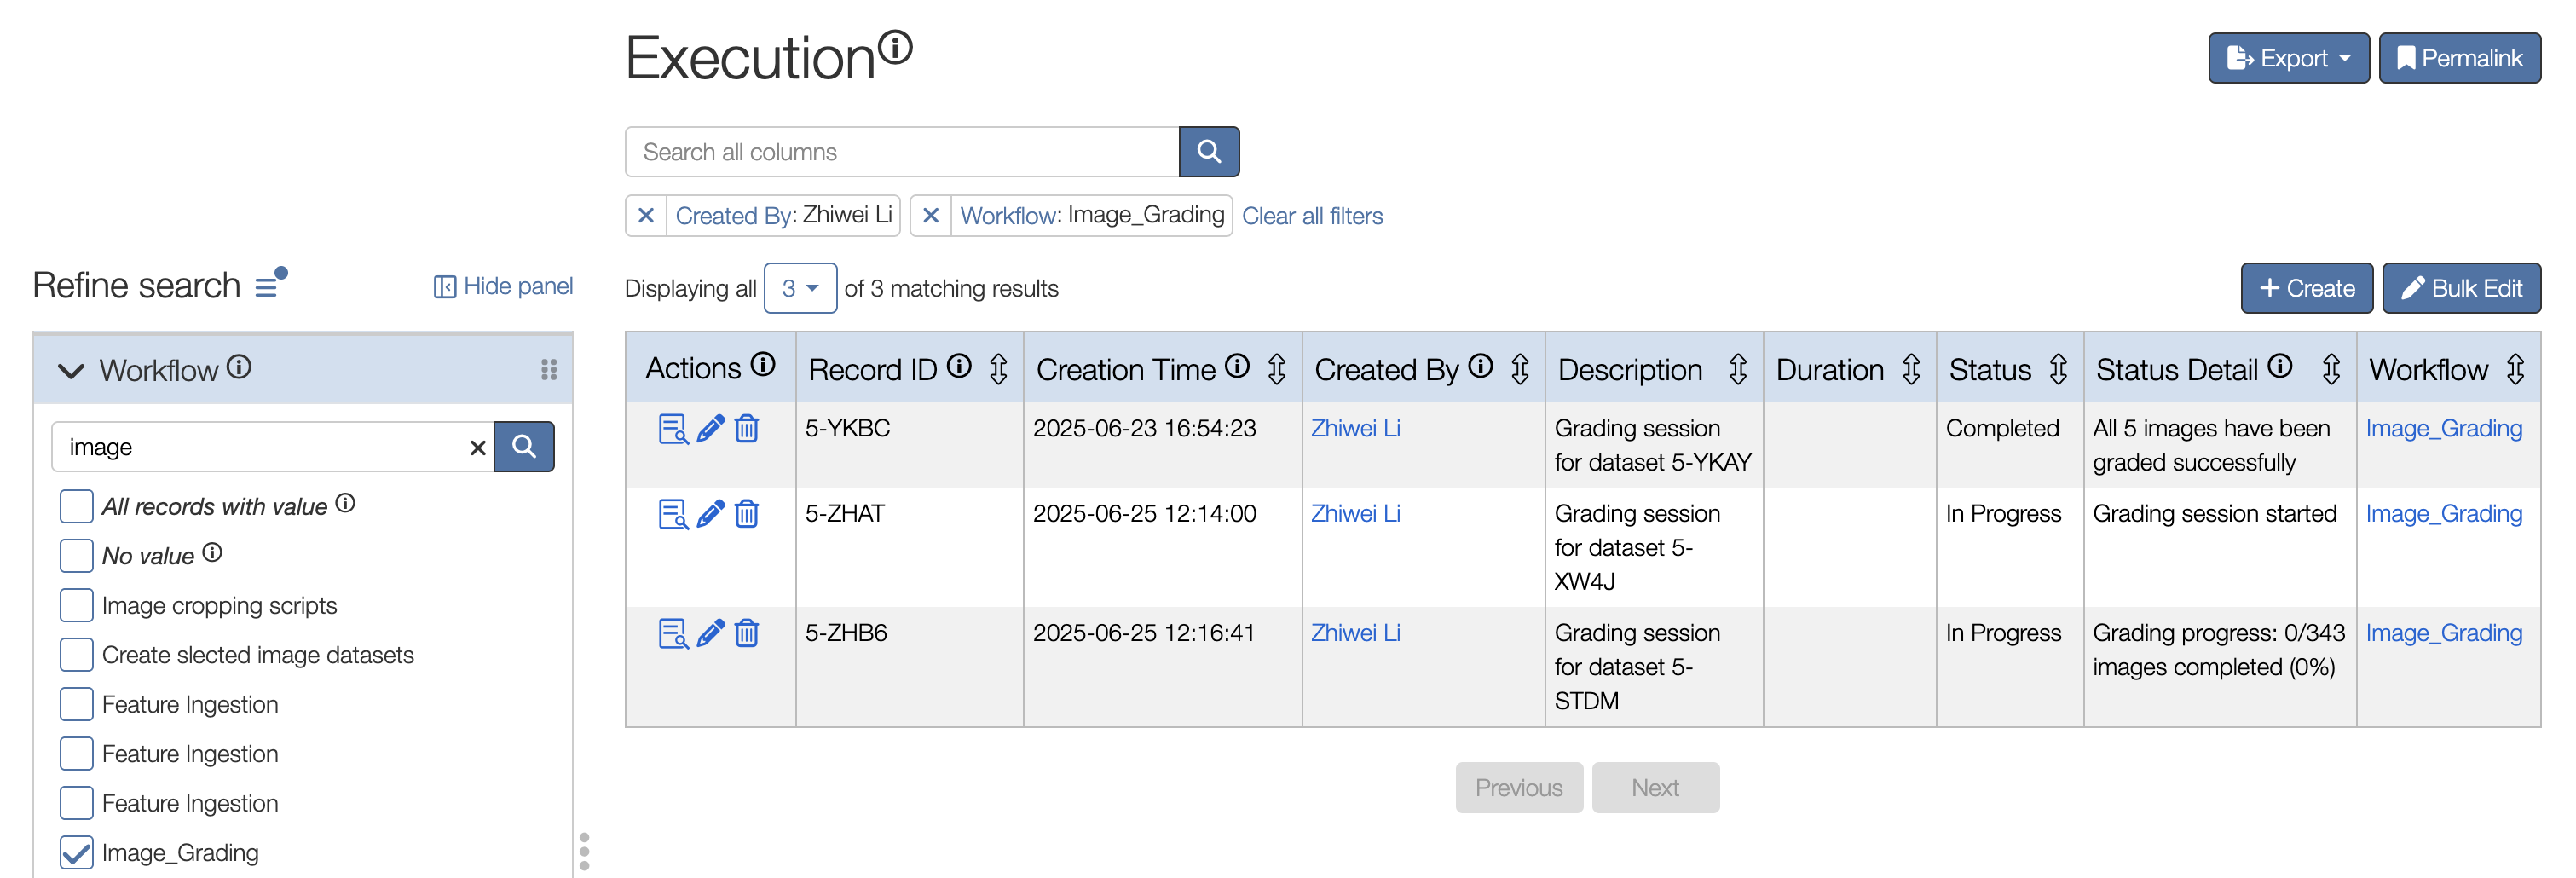
Each user has an execution record for the datasets they grade. After completing the grading session, the execution record can be accessed from the "Execution" table using the left-side filter panel:
- Filter by:
- RCB: Your name.
- Workflow: Image_Grading.
The grading status will be displayed as:
- In Progress: Grading session started.
- In Progress: Grading progress: <# graded_num>/<# total_num> images completed (**%).
- Completed: All <# total_num> images have been graded.
The execution status is updated automatically. Refresh the "Execution" page to view the latest grading status.